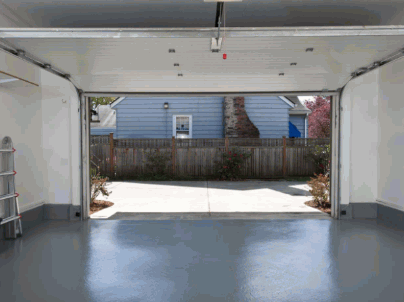
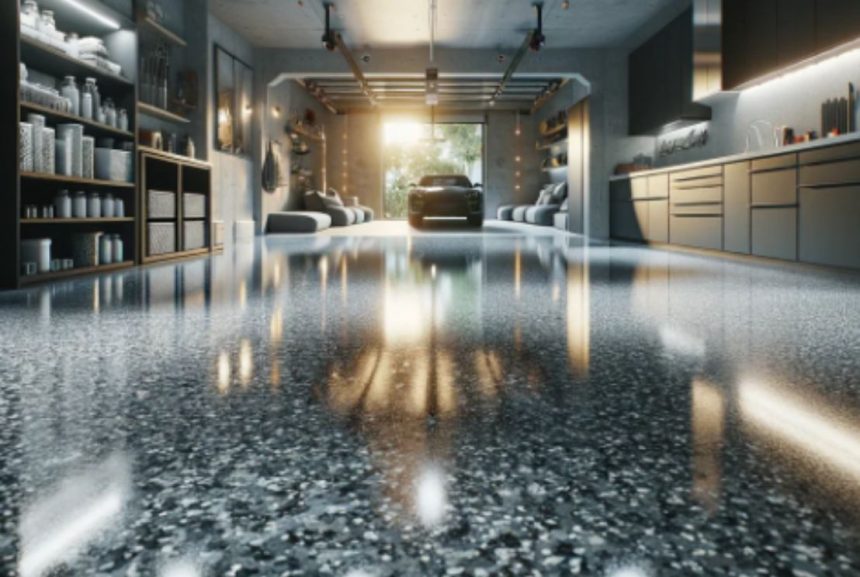
Epoxy flooring is quickly becoming a favored choice for garage spaces, offering a blend of durability, aesthetic appeal, and ease of maintenance. Whether you’re considering it for a DIY project or opting for a professional application, epoxy flooring is an excellent choice for your garage floor.
This article will explore the numerous advantages of epoxy flooring, guide you through the step-by-step process of installation, and highlight essential safety precautions to ensure a successful project.
Get ready to transform your garage into a functional and stylish area with epoxy coatings that offer both practical and decorative benefits.
What Is Epoxy Flooring?
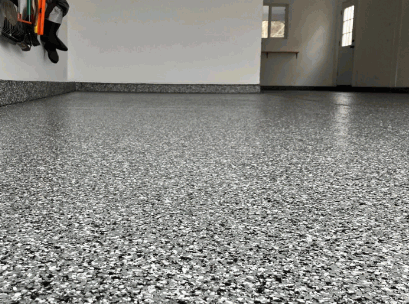
Epoxy flooring is a high-performance flooring system that combines epoxy resin and hardeners to create a durable surface ideal for various environments, particularly in garage spaces. This flooring technology is known for its exceptional strength and resistance to wear, making it an attractive option for both residential and commercial applications. Epoxy resin, combined with hardeners, forms a durable surface that stands up to the test of time. Installing epoxy flooring involves a meticulous process that includes surface preparation, application of coating layers, and curing time considerations, which are vital to ensure a long-lasting finish.
Explore further: Can You Use Epoxy Resin On Wood Floors
Why Choose Epoxy Flooring For Your Garage?
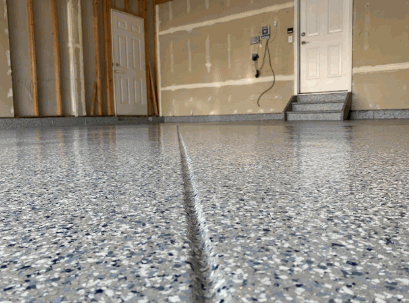
Choosing epoxy flooring for your garage offers numerous benefits that make it a premier choice for homeowners looking to enhance their garage space. The durability and strength of epoxy coatings ensure that they can withstand heavy foot traffic, vehicle loads, and the wear and tear of daily use. Additionally, epoxy flooring is easy to clean and maintain, making it ideal for environments where spills and stains are likely. The epoxy paint provides a sleek, polished finish that enhances the overall aesthetics of your garage floor.
Durability And Strength
Epoxy flooring is renowned for its outstanding durability and strength, which make it perfect for high-traffic areas such as garages. The combination of epoxy resin and hardeners creates a robust surface that can endure heavy loads and resist impact, ensuring that your garage floor remains intact even under the weight of vehicles and equipment. This durability significantly extends the lifespan of the floor compared to traditional concrete surfaces.
What sets epoxy flooring apart is not just its inherent toughness, but also how it can withstand a multitude of stresses typical in a garage environment. For instance:
- Impact Resistance: The tough surface of epoxy can absorb shocks, preventing cracks or chips that often plague other flooring options. Adding an anti-slip additive enhances safety by preventing accidental slips in a busy garage.
- Heavy Load Capacity: Vehicles and equipment, that can weigh tons, will not compromise the integrity of an epoxy floor, maintaining a pristine appearance over time.
- Chemical Resistance: Spills from oil or other substances can be wiped away without staining or damage, making maintenance a breeze.
- Non-Porous Surface: This feature helps prevent the absorption of moisture, which can lead to mold or mildew, ensuring a healthier environment.
All these properties make it an excellent choice not only for its aesthetic appeal but also for its utility, supporting the demands of everyday use in a typical garage.
Easy To Clean And Maintain
One of the most appealing features of epoxy flooring is its ease of cleaning and maintenance, making it an ideal choice for garages where spills and dirt are common. The smooth, non-porous surface of epoxy prevents dirt, grime, and stains from penetrating, allowing for a simple cleaning process that often requires just a broom, floor vacuum, or a concrete degreaser for tougher spots. Regular maintenance ensures that the floor remains in pristine condition and prolongs its lifespan.
Cleaning epoxy flooring is not only straightforward but also efficient due to its unique properties.
For everyday maintenance, a simple combination of warm water and mild dish soap will do wonders, as this mixture effectively lifts dirt without damaging the surface.
- It’s advisable to use a microfiber mop to avoid scratching the glossy finish.
- For deeper cleans, an appropriate floor cleaner specifically formulated for epoxy surfaces works exceptionally well, particularly on stubborn stains or grease. A concrete degreaser is highly recommended for tackling tough spots.
- Using a floor scrubber may help maintain a shiny appearance over time.
Following these recommendations ensures that cleaning becomes a hassle-free task, allowing the user to enjoy the aesthetic and functional benefits of epoxy flooring without the burden of extensive maintenance.
Resistant To Chemicals And Stains
Epoxy flooring possesses remarkable resistance to a variety of chemicals and stains, making it particularly suitable for garage spaces where spills from oil, bleach, and other substances are common. This chemical resistance ensures that the flooring remains unblemished and functional, even in environments where harsh cleaning agents and automotive fluids like oil, bleach, and other chemicals are present. As a result, epoxy-coated floors maintain their integrity and appearance over time.
This durability is crucial for those who frequently work on vehicles or store hazardous materials. Epoxy flooring can withstand a significant range of chemicals including antifreeze, gasoline, and solvents, which are often found in residential and commercial garages. Its non-porous surface prevents liquids from seeping through, allowing for easy cleaning and reducing the risk of slips and falls.
- High resistance to acids and bases
- Protection against harsh cleaners
- Long-lasting finish under significant wear
These properties not only enhance safety within the garage but also contribute to a longer lifespan for the flooring, making it a wise investment for any property owner concerned with maintaining a clean and functional workspace.
Enhances Aesthetics Of Your Garage
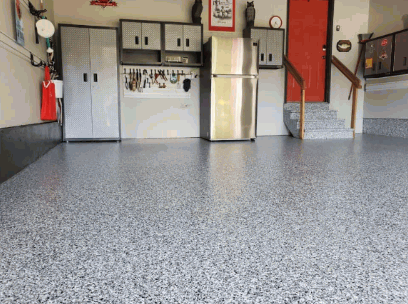
Epoxy flooring not only provides practical benefits but also enhances the aesthetics of your garage, transforming it into a visually appealing space. Available in a variety of colors and finishes, including decorative color chips, epoxy coatings can be customized to match your style and preferences. A polished finish adds an elegant touch while reflecting light, which can make your garage feel more spacious and inviting.
For those considering a renovation, it’s worth noting how epoxy flooring offers an extensive range of customization options that can cater to diverse tastes. Homeowners can explore a broad palette of colors, from vibrant tones that energize the space to subtle shades that provide a serene atmosphere. Decorative features such as metallic finishes or quartz overlays can introduce stunning textures and patterns, contributing to a unique design that stands out. Color selection can be further enhanced with decorative color chips, providing added depth and dimension to your garage floor.
- Color selection to suit individual preferences.
- Incorporation of decorative color chips for added dimension.
- Options for a glossy or matte finish to match desired aesthetics.
In this way, the garage can reflect personal style, becoming more than just a storage area but rather a creative extension of the home.
What Are The Steps To Do Epoxy Flooring In Your Garage?
Installing epoxy flooring in your garage involves a series of essential steps that ensure a successful and long-lasting finish. From initial surface preparation to the final application of the epoxy coating, each stage is crucial to achieving the desired results. Whether you are following an installation guide for a DIY project or seeking a professional application, careful attention to each step will ensure a high-quality finish. Following a well-defined installation guide and application instructions will help you navigate the process smoothly, whether you choose to tackle this DIY project yourself or hire professional services.
Preparation Of The Floor
The first step in the epoxy flooring installation process is thorough preparation of the concrete floor, which lays the foundation for a successful application. This involves cleaning the surface to remove any dirt, grease, or contaminants using a floor vacuum and a concrete degreaser, followed by using a grinding machine or etching solution to create a profile that enhances adhesion for the epoxy coating. Muriatic acid can also be used as an etching solution to ensure the concrete floor is properly prepared. Proper preparation is key to ensuring the longevity of your epoxy floor.
Effective surface preparation not only involves meticulous cleaning but also the crucial choice of tools and techniques that guarantee optimal bonding. A grinding machine is particularly vital, as it helps to smooth out uneven surfaces and remove old coatings, creating a clean slate for the epoxy application. Additionally, etching solutions can be employed to chemically roughen the concrete, promoting stronger adhesion. Without attention to this preparatory phase, the risk of peeling, bubbling, or extensive wear increases dramatically in the cured layer.
- Utilizing a diamond grinding tool for a smooth finish
- Applying a lurking agent for enhanced chemical adhesion
- Conducting moisture tests to prevent future complications
Therefore, investing time and effort in these techniques ultimately contributes to the durability and appearance of the finished epoxy floor.
Filling And Repairing Any Cracks Or Imperfections
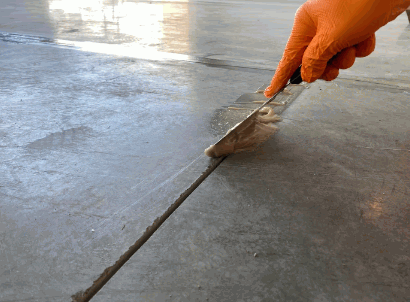
Before applying the epoxy coating, it is vital to address any cracks or imperfections in the concrete floor to ensure a smooth and even finish. Repairing these issues early on not only enhances the overall aesthetics but also improves the longevity and performance of the epoxy coating. Self-leveling fillers are ideal for addressing cracks and imperfections, ensuring a smooth, durable surface.
This crucial step involves identifying all the damaged areas, as failing to do so could lead to unsightly bubbling or peeling in the future.
- Using self-leveling fillers helps to fill in holes and small cracks effectively.
- A floor scraper can be employed to level out high spots and ensure that the surface is even.
Be sure to clean the surface thoroughly before and after filling to promote adhesion. Using painter’s tape can help protect adjacent areas from accidental spills during the repair process.
Implementing these techniques not only safeguards the integrity of the epoxy but also elevates the quality of the finished epoxy floor coating, making it a key aspect of any home improvement project.
Cleaning The Floor Thoroughly
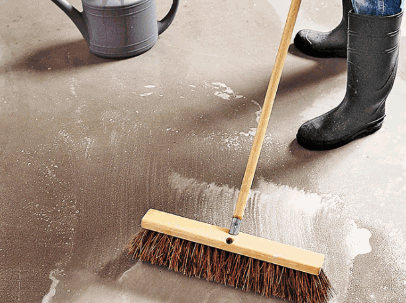
Once the floor has been repaired, it’s crucial to clean the surface thoroughly to remove any debris or dust that may interfere with the adhesion of the epoxy coating. This can also involve repairing concrete if necessary. A thorough cleaning process often involves using a floor vacuum or broom to remove loose particles, followed by scrubbing the floor with a scrubber brush and a concrete degreaser to eliminate any lingering contaminants. This step is vital to achieving a strong bond with the epoxy material, contributing to the epoxy durability of the final finish.
Cleansing the floor meticulously before proceeding with the epoxy application cannot be overstated; this preparatory phase lays the groundwork for a flawless finish and should include the use of muriatic acid if needed. Using a combination of tools ensures that every crevice is addressed and free from dust or grime that could impact adhesion.
- The first step involves deploying a floor vacuum, which efficiently captures loose dust and dirt particles.
- Following this, it’s recommended to utilize a scrubber brush alongside a specialized concrete degreaser.
- This scrubber should be used to agitate the surface and remove any embedded contaminants effectively.
Neglecting this vital cleaning process can lead to peeling or bubbling of the epoxy, making it essential for anyone looking to achieve a durable and visually appealing flooring solution.
Applying The Epoxy Primer
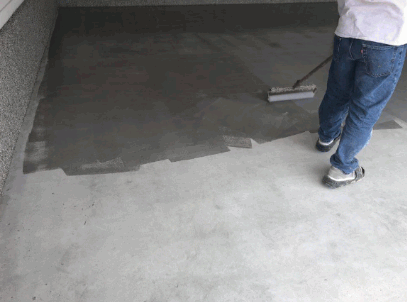
After the floor is clean and dry, the next step in the epoxy flooring installation is to apply an epoxy primer, which serves as a bonding agent for the subsequent coating. Following the application instructions provided with your epoxy kits, use a paintbrush to carefully apply the primer along edges and corners, and then use a roller extension for even coverage over the larger areas of the floor. This primer layer is essential for ensuring the longevity and waterproof coating properties of the epoxy system.
Applying the epoxy primer properly greatly influences the performance and durability of the entire flooring installation, including its ability to withstand floor maintenance challenges over time. Achieving an even distribution of primer is crucial; an uneven application can lead to weak adhesion and premature wear. Proper painting techniques are essential during this step.
To maximize effectiveness, consider these methods:
- Ensure that tools like the paintbrush and roller extension are of high quality, as they can significantly impact the application process.
- Work in manageable sections to maintain control and focus, allowing for a more consistent application.
- Feather out the edges of the primer to prevent thick lines that may show through the finished epoxy.
Ultimately, dedicating time and effort to this step improves the overall quality of the flooring, ensuring a stunning finish that stands the test of time.
Mixing And Applying The Epoxy Coating
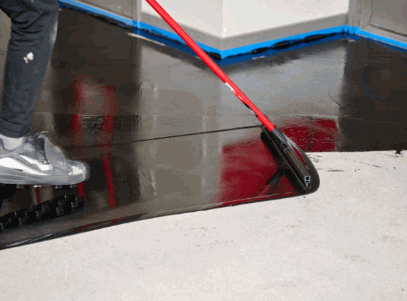
Mixing and applying the epoxy coating is a critical step that requires precision to achieve a flawless finish on your garage floor. Begin by carefully following the mixing instructions included with your epoxy kit to combine the resin and hardeners, ensuring a consistent mixture.
Proper mixing and application techniques cannot be overstated, as they significantly influence the durability and appearance of the final surface. If the epoxy coating is not mixed correctly, it can lead to issues such as bubbling or uneven curing, which compromises the overall aesthetic.
After achieving a well-blended mixture, opt for a rolling method or squeegee for application—as these methods assist in spreading the epoxy uniformly. This pouring method helps achieve a smooth surface. It’s also crucial to consider environmental factors like temperature and humidity, as these can affect drying times and overall epoxy durability.
- Ensure the garage is well-ventilated to promote proper curing.
- Avoid applying during extreme temperatures to ensure optimal bonding.
- Utilize drop cloths and masking tape to protect areas that shouldn’t receive epoxy.
By meticulously adhering to these guidelines, including the proper application method, the result will be a robust and visually appealing garage floor that stands the test of time.
Adding Decorative Elements (Optional)
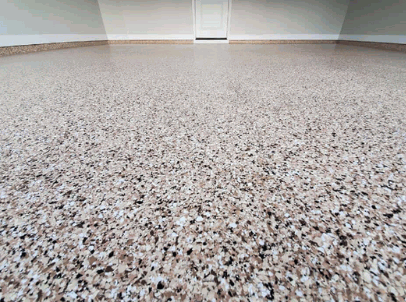
For those looking to enhance the visual appeal of their epoxy flooring, adding decorative elements such as color chips can provide a unique touch to the garage space. After applying the main epoxy coating, sprinkle the color chips evenly across the surface while it is still wet, ensuring an attractive and custom finish. This optional step not only adds aesthetics but also helps to hide minor imperfections in the epoxy layer.
Incorporating these vibrant color chips allows for a level of customization that can align with personal style or complement existing decor. When selecting color chips, consider the overall color scheme and the desired atmosphere of the garage. With a variety of options available, homeowners can:
- Choose a contrasting color to create a striking focal point.
- Opt for a monochromatic look by matching chips closely with the base epoxy color.
- Mix different sizes and shapes of chips to introduce texture and depth.
This thoughtful selection of color chips significantly impacts the final appearance, transforming a simple garage floor into a visually stunning area that can even contribute to the perceived value of your home.
Applying A Topcoat For Extra Protection
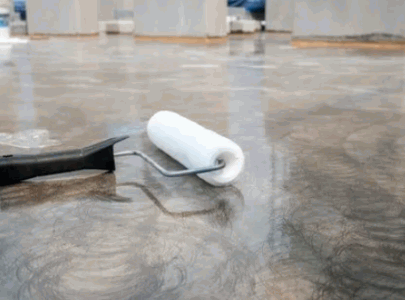
To maximize the durability and longevity of your epoxy flooring, applying a protective coat such as a clear top coat is the final step in the installation process. This protective coat enhances the overall finish while providing an additional layer of resistance against scratches, stains, and chemical spills, making it an essential part of floor maintenance. Following the application method outlined in your epoxy kit, carefully apply the top coat once the colored epoxy is fully cured to ensure optimal adhesion and performance.
Understanding the significance of this clear layer cannot be overstated, as it plays a vital role in maintaining the aesthetic and functional integrity of the flooring. By creating a resilient barrier, the top coat prevents wear and tear from heavy foot traffic, making it an essential choice for both residential and commercial spaces. When applying the top coat, ensure that the room is well-ventilated and that the temperature conditions align with the manufacturer’s guidelines.
- Wait at least 24 hours after the epoxy application for the top coat to maintain its protective properties.
- Use a roller with a 3/8-inch nap for even distribution.
- Consider multiple layers for areas that will experience heavy use.
Ultimately, this careful attention to the top coat can drastically improve the lifespan of your epoxy flooring, ensuring it remains both functional and visually appealing for years to come.
What Are The Safety Precautions To Take When Doing Epoxy Flooring?
When undertaking an epoxy flooring project, it is essential to adhere to safety precautions to protect yourself and ensure a successful installation. Proper ventilation is crucial, as epoxy fumes can be harmful if inhaled in high concentrations. Additionally, wearing protective gear, including safety glasses and gloves, will safeguard against skin irritation and chemical exposure during the installation process. It is also important to properly dispose of any leftover materials and cleaning agents to prevent environmental contamination.
Proper Ventilation
Ensuring proper ventilation is one of the most critical safety precautions when working with epoxy flooring, as the fumes released during the curing process can pose health risks. This is especially important in a workshop or garage setting. It is advisable to work in a well-ventilated area, such as opening windows or using fans, to reduce the concentration of vapors and maintain a safe breathing environment. This step is essential for protecting your health during the installation.
Employing an exhaust fan can significantly enhance airflow, effectively dispersing harmful fumes and promoting a healthier workplace. If outdoor conditions allow, consider:
- Positioning fans: Direct them towards windows to create a cross-flow of air.
- Using air scrubbers: These devices help filter out toxins and particulates.
- Monitoring temperature: Warmer air holds more vapors, so maintaining a cooler environment can prevent fume accumulation.
Regular breaks in the fresh air can also aid in alleviating any lingering effects of fume exposure. It’s crucial to prioritize safety by ensuring adequate ventilation during the epoxy installation process, safeguarding both health and comfort.
Protective Gear
Wearing appropriate protective gear is vital for anyone involved in the epoxy flooring installation process, as it helps prevent injuries and chemical exposure. Make sure to use safety glasses and chemical-resistant gloves. Safety glasses should be worn to shield your eyes from splashes, while gloves protect your hands from irritating substances. Ensuring you have the right equipment, including a paintbrush, roller, and protective gear, is an essential part of maintaining safety during your DIY project.
When embarking on an epoxy installation endeavor, it’s crucial to recognize the importance of protective measures to ensure a safe working environment.
Along with safety glasses and gloves, one should also consider wearing long sleeves and closed-toe shoes to protect against potential chemical splatter and sharp objects commonly found in the workspace.
This type of clothing can provide an extra layer of defense, significantly reducing the risk of skin irritation and accidents.
Respirators or masks may be necessary if working in poorly ventilated areas, as the fumes from epoxy can be harmful when inhaled.
By taking these precautions seriously, people can enjoy a safer and more effective DIY experience, allowing for a stunning final result without jeopardizing their health. It’s imperative to use chemical-resistant gloves and other appropriate protective gear.
Proper Disposal Of Materials
Proper disposal of leftover epoxy materials is crucial to prevent environmental contamination and adhere to safety regulations, especially when dealing with substances like muriatic acid and degreasers.
After completing your DIY project such as a decorative epoxy flooring, it becomes imperative to handle the remaining epoxy and related substances responsibly. Improper disposal, including substances like oil and bleach, not only poses a risk to local wildlife and ecosystems but can also lead to serious legal repercussions. By ensuring that all unused epoxy, cleaning agents, and any other hazardous materials are disposed of in accordance with local regulations, homeowners and contractors alike contribute to a safer and cleaner community.
Following these disposal guidelines not only protects the environment but also promotes safety within your workspace. Here are some important considerations:
- Consult local regulations: Many areas have specific guidelines for hazardous waste disposal.
- Use designated disposal sites: Utilize local recycling centers or hazardous waste facilities.
- Consider recycling: Some epoxy materials, such as those from brands like Sherwin Williams Armorseal 1000, may be eligible for recycling programs.
Being proactive in your disposal practices ensures that you do your part in safeguarding both the environment and public health.
